| Using a jack, raise the rear of car off the floor. I would strongly recommend the use of axle stands under the car and wheel chocks on the front wheels to ensure your safety should the car move or jack fail | |
| I would recommend placing the jack underneath the rear diff mount supporting member so that you can remove both rear wheels easily | |
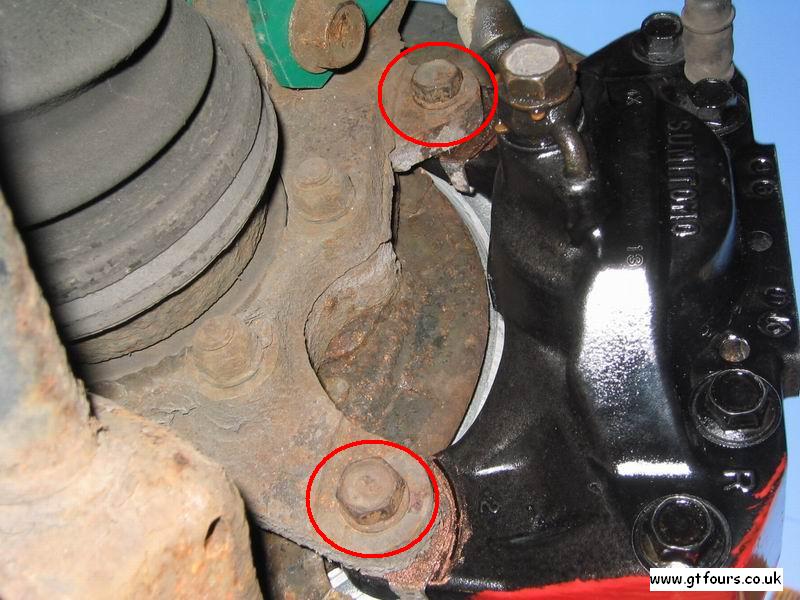 |
Once you have removed the wheels, before you can remove the old disk, you have to remove the brake calliper To do this, undo the two bolts holding the calliper onto the rear of the hub (as shown) and slide the calliper off the brake disk. Move it to rear of hub where it can be left to dangle whilst you remove the brake disk. Note - you may have to push the pads back in order to allow enough room to slide the calliper over the worn disk If you do have to push the pads back, note that brake fluid will flow back to the reservoir under the bonnet, so ensure this does not overflow! If needs be, undo the bleed nipple and drain off some fluid from the calliper |
|
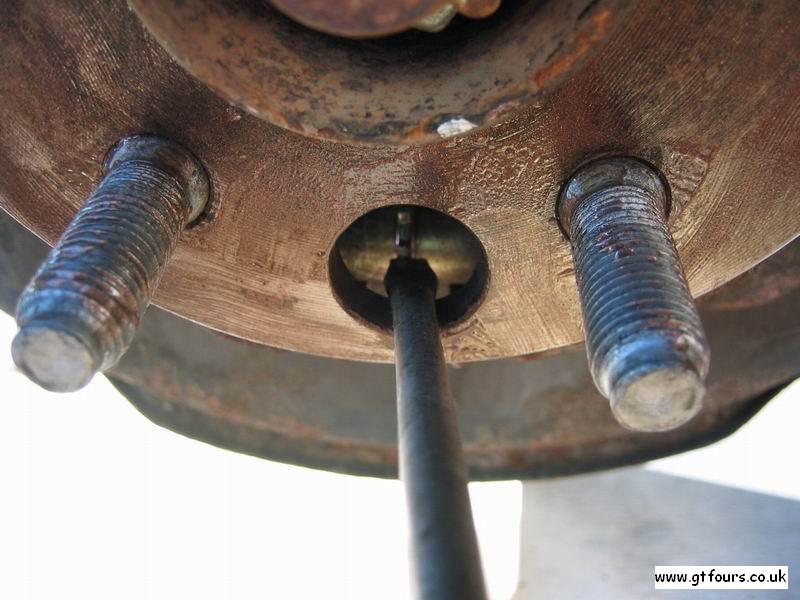
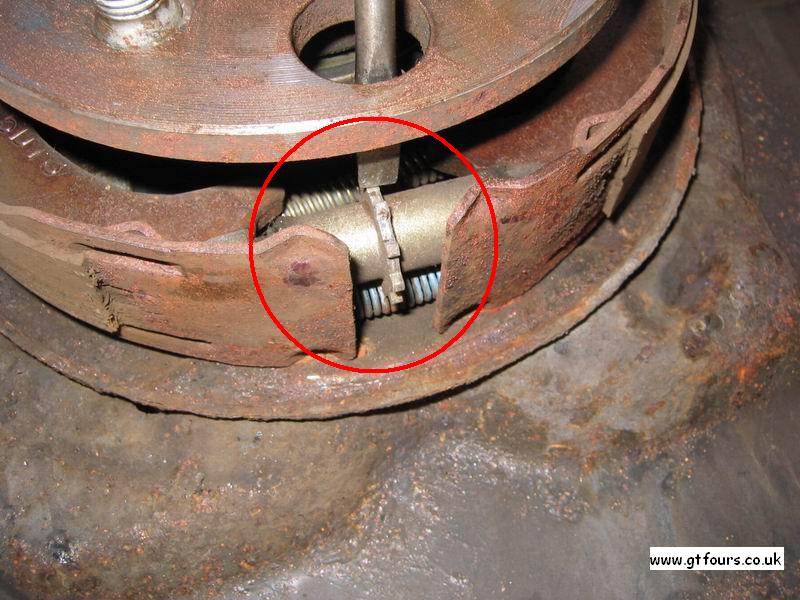
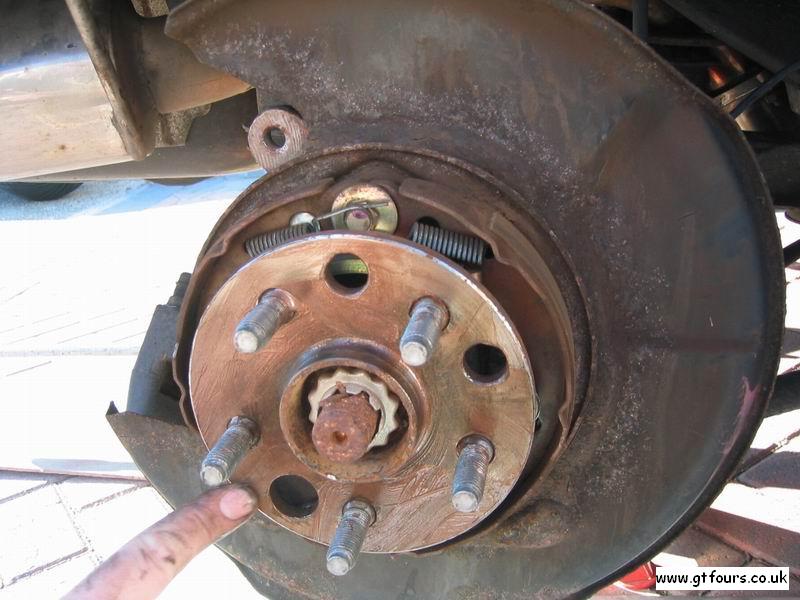
Release the handbrake lever within the cockpit to and then try to pull the old brake disk off the hub This may be very difficult to do and so an easy way to help release the disk from the hub is to use 2 off M8 x 1.25 bolts which screw into the face of the disk. Doing these bolts up evenly will help to lever the disk off the hub (as shown). You may also need a little help from a rubber mallet to tease the disk off the hub once you have released it using the bolts as described above Tip you may wish to loosen the handbrake to help release the brake disk. See handbrake adjustment 'how to' for further details if this is required |

|
These pictures illustrate how the handbrake is adjusted and how the shoes can be withdrawn from the disk to allow it to be pulled free |
 |
Once the disk is free of the hub, it is simply a case of pulling the old disk off, and fitting the new one in its place. I would recommend that you de-rust the hub face with a wire brush and use a little anti seize compound (such as copper crest) on the hub face before fitting the new disk |
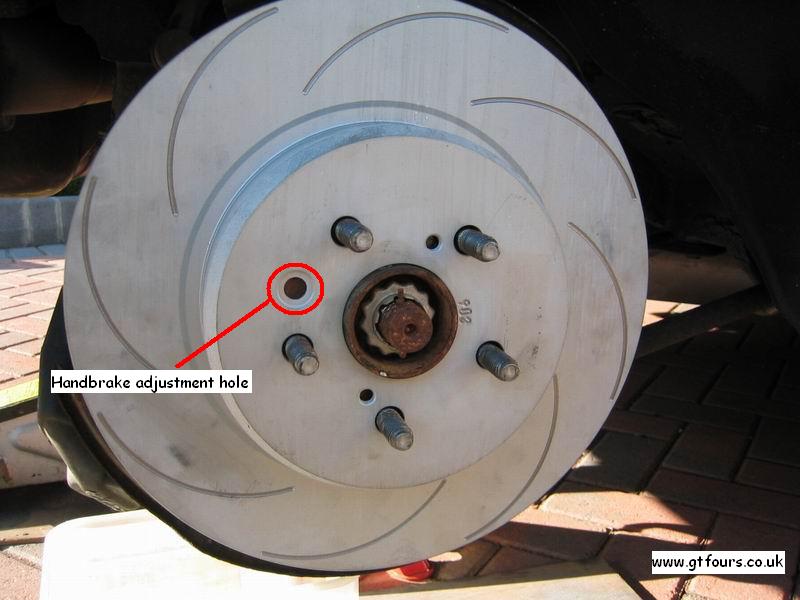 |
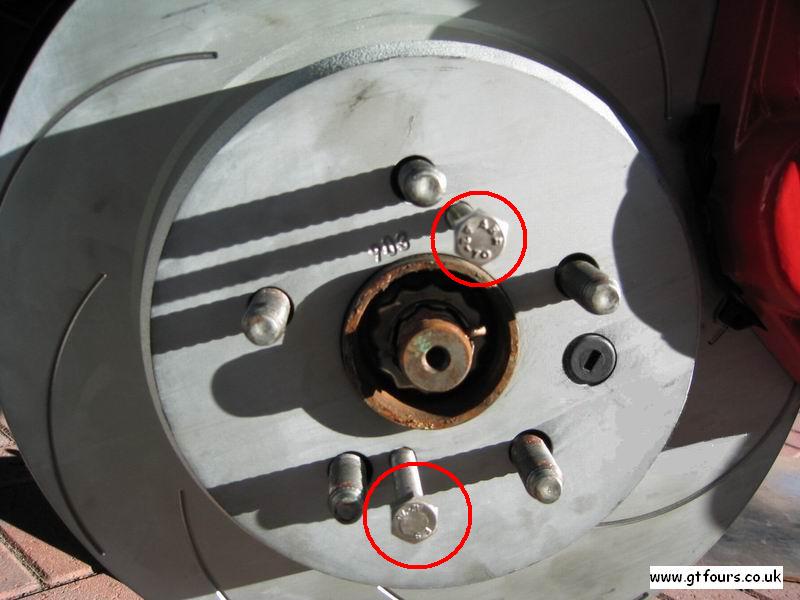
Then in true ‘Haynes manual’ fashion, simply place the new disk onto the hub! NB - make sure that the handbrake adjustment hole on the disk lines up with the handbrake adjustment hole on the hub as indicated Tip you may wish to loosen the handbrake to make this task easier. See handbrake adjustment 'how to' for further details if this is required |
|
And that’s it, job done! All you need to do now is replace the brake calliper ensuring that you torque the bolts (as shown) to 47Nm If you have adjusted your handbrake to allow for brake disk removal/fitting you will need to remember to reset it and replace the rubber grommet. Once this is done, replace the wheels, ensuring that you torque the wheel bolts to 103Nm |
| The process is almost exactly the same for the front brake disks, except that these are easier. Note that you will not need to adjust the handbrake |